
How to Add a Wire Hanger to Display Slow Stitched Textile Art
- jo morphett

- Sep 5, 2025
- 2 min read
Updated: Oct 7, 2025
Recently my wire hanging method for displaying textile art was included in a fantastic article on TextileArtist.org where nine Textile Artists shared their go-to methods. Hop over and check it out for creative ideas and how-to's.
Here's the Slow Stitched artwork I added wire to for hanging.

You can see this artwork come to life in this video:
The video doesn't include a tutorial on adding the hanging wire. But no worries!
Here's a detailed step by step of my wire method:

Supplies
A Textile Artwork to hang
Backing fabric - Wool Felt or Fabric
Wire - 22 or 24 gauge (copper wire, craft or floral wire)
Wire cutters
Embroidery Floss in a colour that matches the backing
Embroidery Needle
Ruler
Scissors

Step 1
Cut a length of wire approximately triple the width of your project.
Bend the wire into a triangle: Fold it in half without pinching to create a round top. Then fold each cut end up, bending the wires inward to create a triangle shape. Twist the two wire ends around each other to secure. Trim any excess wire.
The base (long side) of the triangle should be about 1/4 inch shorter on each side than the width of your project. Pinch the top of the wire slightly to create an oblong shape at the top.
Encouragement: Folding a “perfect” wire triangle may be a challenge, but don’t worry - some wonkiness is ok - as long as the part of the wire that “shows” or extends above the top is centred and a uniform shape it will look great.

Step 2
Centre the wire on the back in your desired position allowing the tip of the triangle to extend above the top (you can use a ruler to find the centre of your work).
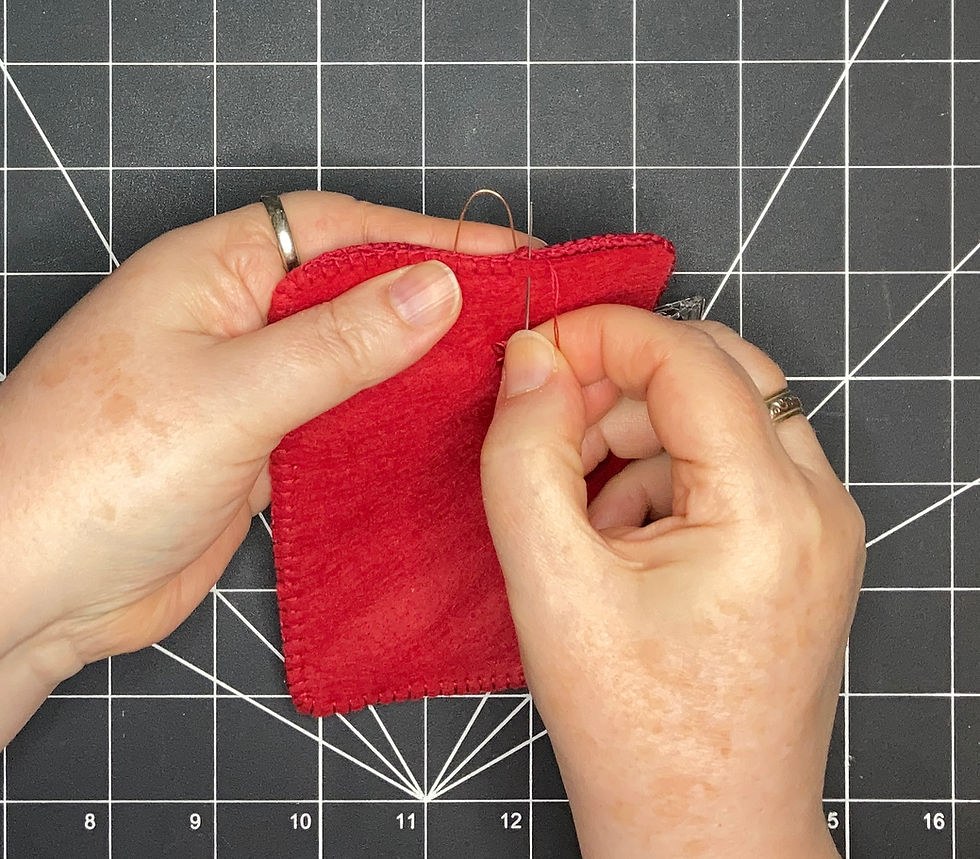
Hold the wire in place with your non-dominant hand. Secure the wire by Whip Stitching using embroidery floss, stitching into the backing only so your stitches do not come through onto the front.

Step 3
Look at the placement of the wire from the front. Make any necessary adjustments.
Step 4
Attach the backing fabric using your desired stitch (I used the Blanket Stitch), enclosing the wire between the front and the back material.

It's Finished!
Here is the back. The wire is enclosed and it's securely attached. Now this piece is ready to display on a wall using a hook or a nail.

This wire method has several options to suit your project - The wire can be placed low so it almost doesn’t show or the wire can be raised up to add a decorative element - you can even wrap the wire in embroidery floss to match your work.
For more ideas on how to display your textile art, check out the post on TextileArtist.org that features methods used by nine different Textile Artists.
Happy Stitching! ~Jo


Comments