Adding Slow Stitching Patchwork to a Jean Jacket
- jo morphett

- Aug 1, 2023
- 2 min read
My vintage jean jacket (circa 1994) was due for an upgrade - so it was Slow Stitching to the rescue! I started by creating a fabric collage on felt and then chose a bunny as the focal point. I used my mini bunny template from my miniature set to trace and stitch the bunny onto the patchwork.

After stitching the bunny and embellishing the piece with layers of slow stitching, the completed patchwork was ready to be sewn onto the jacket. I did a few test runs for placement and decided on adding the piece on the back of the jacket. You can see the whole process on my YouTube channel.
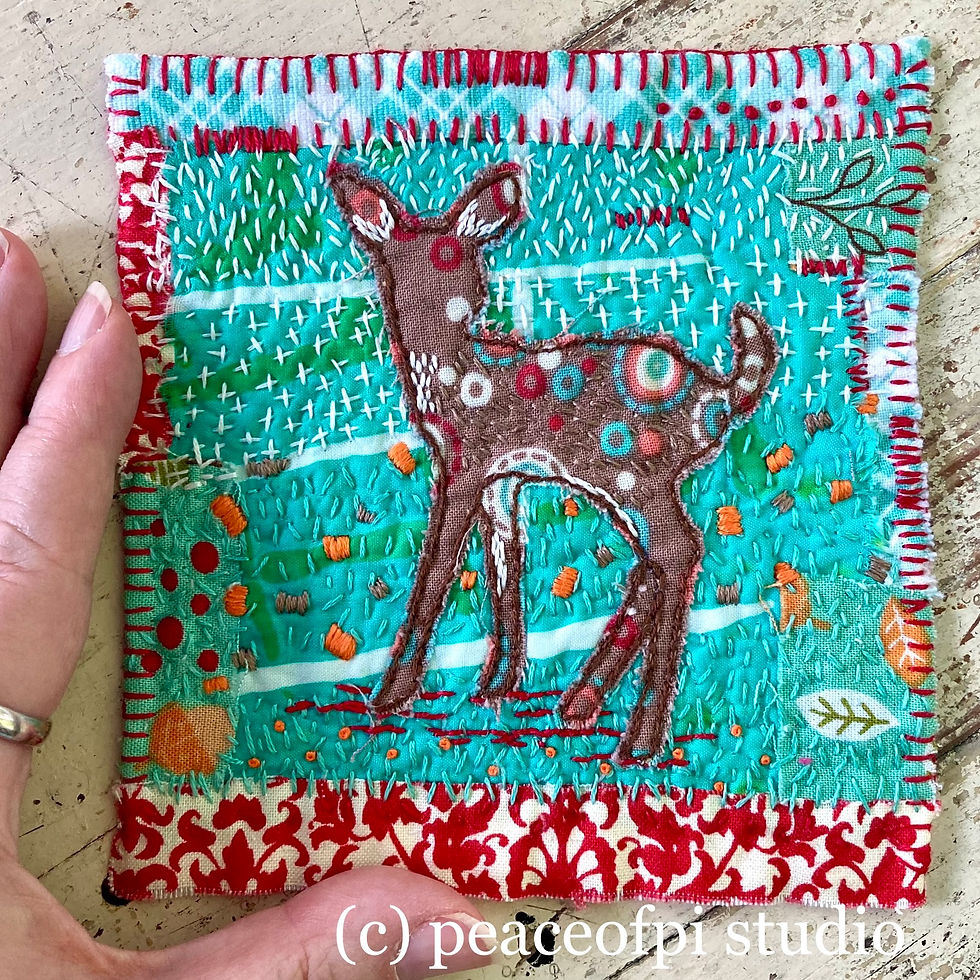
I loved the look of the little patch on the back so I decided to make the entire back panel a slow stitching patchwork. The next piece I created was a deer fawn patch. Again I used a template, this time a fawn from my baby animal set (with bear cubs, a fawn and a duckling).
I decided to keep a unified colour palette and stick with the fabrics I had used on the bunny patch so I only added one additional fabric - a nice brown with dots. To cut the deer out of the brown fabric I used the freezer paper technique - this allowed me to have nice clean edges when cutting out details like the skinny legs of the little fawn. A video of the entire process is on YouTube. Here she is right before I stitched her onto the jacket. SO sweet.
For the third and final patch I decided on a fox, making the entire back panel a fun woodland theme. I used the fox from my woodland template set to cut out an orange vixen. I stitched her down and added some details in black (face, legs) and white (face, tail).
For the fox piece I did something different and created a mosaic effect with blanket stitching. Check it out below. I love the effect of spiralling blanket stitch. You can see the whole process of how to create a stitched mosaic on YouTube if you would like to give it a go. Here's that little fox all sprially and ready to be sewn to my jacket.
The mosaic is so satisfying to create and once you get started it's easy to just stitch the day away, spiralling and spiralling!
Once this final patch was sewn in place, I stitched on multiple tiny pieces of coordinating fabric filling in all the gaps in between the three patches. When everything was sewn down I covered it all in slow stitching lines using white pearl cotton. This unified all of the pieces and made the whole panel one big woodland patchwork. Check it out. I can't wait for the weather to turn chilly so I can wear it!

I've created a playlist that documents the whole process, patch by patch. I think this jacket is calling for more embellishment. Who knows what I'll do next! ~Cheers! Jo


Comments